I love lamp

For freelancing, its important to have a good “office space” at your casa. Especially for me. i get very distracted and need a creative, calming space to be able to really sit down and get to work. I got this glass lamp from Target a few months ago and its been a life saver – especially when i work late at night which tends to happen a lot. I have to have some really nice lighting.

Its been such a great lamp but i saw this shade at Target and i just had to have it. I made googly eyes at Kenny as i held the shade like a baby. He said “it definitely looks like you” and that was the end of it. She was comin home with me! Lamp shades are a great way to bring color into a space and i definitely am a sucker for yellow these days. And pattern on pattern? I dig it. I dont think i could ever have too much pattern. Plus having a small grey pattern with a large yellow one just makes me happy, ill be honest. Plus my little wooden dude loves it, so its a done deal.

Bam.

-Rachel

DIY Floating Shelves

First off, please excuse the crummy before shots. Blame my phone! Anyway, I’ve been in need of some office organization for a while. I just had boxes and papers everywhere. Ok, im slightly embarassed to show this… but this is what my office was looking like for weeks:

Yikes! I know! We just didnt have a filing cabinet so we had stacks of papers everywhere and there just wasnt enough space in there for everything. Thanks to my DIY vintage trunk filing cabinet, I’m halfway to organization!  So i also decided i needed some more shelving space. So on the far right wall, i switched out that small wooden shelf for a larger vintage metal one (you’ll see it in the after pictures). And i decided to make floating shelves!

I have small floating shelves from Target but they are very poorly made and easily pull screws out of the wall. I really wanted to make something more substantial. Since i follow Young House Love everyday, i knew where i needed to go. Ana White did a floating shelf how-to on their site over here so i went to check that out. If you dont know either of those bloggers, you definitely need to check them out. Anyway, so on the how-to, Ana put together a digital guide to show you how to build them. I went with this concept because its a really solid construction and goes directly into studs. Since my wall was a lot smaller, i went with 4ft shelves instead of 6. The three graphics/images below are by Ana White!

I just really liked the simplicity of these shelves and the solid construction of them so i went to work! Go to the step by step how to for details.

I also got to use my fancy Laser guided Miter Saw for the first time on this project! Woot! Maybe one of the best gifts we got on the registry. And my favorite part? It was one of Kenny’s friends that got it for him so that he could actually have something as a wedding gift too… little did he know it was actually for me 🙂 Of course, as always… i had to use my (teeny tiny) side porch to use this sucker. Cant wait for a garage.

Once i had all my wood cut, nailed, glued and all put together, it was time to paint! Since I painted these shelves the same grey (That was Kennys vote instead of “boring white”) as the vintage chest so it made sense to paint them at the same time.

Here is what i used:

  • Paint – Olympic All in one paint + primer in semi gloss
  • Minwax Polycrylic protective finish
  • Small foam roller (get a high quality dense foam. trust me, its worth it)
  • Paint tray
  • screwdriver

The trick is to do multiple THIN layers. Lay it on thick and you’ll get lots of bubbles and drips. Eww. So here it is after 2 thin layers.  For these you dont need an angled brush so pretend thats not there. Here are the shelves after one thin layer. I did three layers for these guys and didn’t take much paint at all. I used one quart for these three shelves and the vintage trunk. And then spilt the rest on the carpet. but thats another story.

I threw them up on the wall to check how well they were spaced, if they were balanced, etc.

Im going to be honest because, well… thats what blogs are for. This project was a horrible pain in the butt. Lets just put together a list of all the things that went wrong:

  • Since i dont have the best set up to cut plywood, i had them cut it in the store. Which they cut horribly wrong. So i had to go buy more plywood from a different shop. Which also cut them wrong.
  • The 1X2s were just slightly warped (though they were the straightest i could find in the store) which made one of the entire shelves horribly warped so i had to go buy more 1x2s.
  • i used my fancy new miter saw to cut the 1X2s and smashed the crap out of my thumb. thankfully i didnt cut it off.
  • Since i dont have a nail gun, to nail the plywood on the 1x2s i had to nail them by hand. smashed the crap out of my thumb. again.
  • The screws i used initially would BREAK OFF INTO THE WALL. The metal was just too weak even thought they are wood screws. Yes, there are maybe 4 different screws stuck in the wall. (Dont tell my landlord) So i had to make new holes for new screws. Kennys dad just happened to have bad ass screws in his car so he gave me a handful of them. I just highly suggest spending extra on higher quality screws.
  • If you read over here, you already know that Maggie (the puppy) spilt the entire can of paint onto the drop cloth and seeped into our carpet (PLEASE, dont tell my landlord! Hopefully my landlord doesnt read this…)
  • Once they were all together and on the wall i realized they were sagging! Without even anything on them! I talked to my dad in law (aka carpenter extraordinaire) and he says to A. either use brackets or B. screw the right side into the wall. Because of the way these shelves are built, i cant go with B and A would make sense if i had solid shelves. They dont sag TOO much so i decided just to leave them as is and deal with the fact that they arent perfect. by any means.
  • I also used a filler that didnt do a good job at filling so theres about 57 blemishes. Im ok with it for the most part but they are very far from flawless.
  • They can’t hold much weight. Considering i needed to put boxes and books on them, basically this whole project ended in shelves for decoration. Which of course, im ok with but its not what i needed.
So to conclude… this was one of the most frustrating projects I’ve done. I think if i were to do this all over again, i would just go with solid wood and brackets. Thats not my ideal visually but they would be much sturdier and better for what i needed them for. If you want shelves that dont hold a ton of weight and just want them to look good, then go for it!

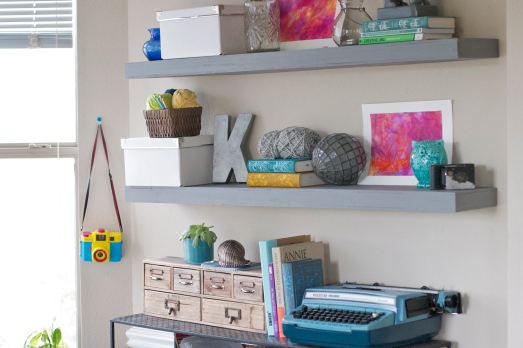
With all that said, i am happy how everything turned out. My office is much more clean and organized and its really been staying like that. Plus it was fun to decorate these beauties with some fun new artwork.

Oh, and I just got this cute shelf from Home Goods. Love it! It has that vintage feel and cute little drawers. Im a sucker for little drawers.

I’ll have the whole office before and after soon!

-Rachel

Label Addict

Ok i have to admit i went a little label crazy. pretty sure my husband thinks im nuts. So ive been working on our Vintage Trunk/coffee table/ filing cabinet and did a file overhaul. We just had so many papers everywhere, there was no organization to the chaos. But finally… ahhh… a breath of fresh air and organization. PLUS ITS PRETTY. Yes, i think my files are pretty. I’m actually excited to file away bills. I know, super weird. But come on… this is some organizational eye candy:

For those of you that  have a silhouette, i tend to print out 12 projects at a time and smush them all together… ok so this is only two projects but i added maybe 20 more words later on. The Recipes label is for my fancy new DIY Recipe box over here. Oh and incase you like the font i used for this project, its called ChunkFive and you can download it for free over here. When printing out text, i tend to get really chunky fonts especially if its smaller than three inches wide. After typing out the word, i turn down character spacing so that the letters are overlapping slightly and then i hit “weld” to make them one solid word. Makes it easier and  i like the look of it. So win win!

Then i went to Target and picked up some clear filing bins and these oh so cute filing folders. Initially I wanted to take the Vintage Trunk makeover and throw in some hanging file bars in there but when i saw these ins i thought it would be easier. Instead of hovering over a trunk all the time, if we need to organize or sort through personal stuff, we just grab the “personal” bin. Wham, bam, thank you organization.

Here you can see some of the categories. We have three main bins seperated into “Personal” “$$$” and “Other”. We basically threw everything onto the floor and started making piles. I should have taken a picture, it was pretty crazy. There were piles and sticky notes all over the place. Some things i didnt know what category it should have so i just started piling like items and thats how we came up with some random categories like “Non – profits” and “Church”. Those are items that usually arent in a filing cabinet but we had so much paperwork that it just made sense to make its own folder. So heres all the folders we have so far:

Personal:

  • Kenny Personal (includes passport, IDs, birth cert, etc)
  • Rachel Personal (same)
  • Health – Kenny (medical bills, insurance info)
  • Health – Rachel
  • Pet info  (Shots, medical bills, etc)
  • Sponsorships (info on our sponsor kids, organizations, etc)
  • Non-profits (info on the multiple non profits we adore)
$$$:
  • Utilities (electric bills, water bills, etc)
  • Employment Kenny (Resumes, transcripts, invoices)
  • Employment Rachel
  • $$$ (Bank info, student loans, credit cards)
  • Other Bills
  • Taxes (W2s, tax info)
Other:
  • Home (Rental info, insurance,etc)
  • Auto – BMW (maintenance, titles, insurance)
  • Auto – TC
  • Church (bible studies, classes, membership info)
  • Receipts (random receipts we might need)
  • Wedding (Receipts, vendor info, $ info)

Here they are all tucked into their new home.

The other great thing about the trunk is that it had a large shelf on top of the files. This is great to throw new mail, things to be sorted, remotes, etc. As far as the plan for the interior, if it was in better shape, I’d love to keep it as is – it has a great texture and a vintage feel to it, but it has sections missing, stains, etc. We could definitely throw a cork board in the lid which would cover up most of the stains, but I’ll definitely let you know when we decide!

Well there you go! Definitely “pretty” files, right? I definitely think so. And really, who can tell that this is a filing cabinet?!

-Rachel

Horrible Ugly Filing Cabinets

First off, i have to vent for a sec. Why on earth are there two types of filing cabinets in the world? Metal, beige, ugly as hell… or 400 bucks? I scouered Craigslist, considered repainting an ugly metal one, considered sanding an ugly metal one, considered building a wooden one from scratch… this went on for maybe a month. I’ve been looking all over the webs to find an awesome filing cabinet for cheap. Let me tell you… its non existent. Since getting hitched three months ago, we’ve had the dreaded filing issue… we both used small accordion folders to hold our paperwork but it just wasnt cutting it. My office started to look like a place where paper goes to die. There was paper piling up on my desk, on the floor, in nooks and crannys. With tax time coming up, we started misplacing W-2s, losing papers, misplacing bills… it was just not going well. I just cant have something looking ugly like this in my pretty office:

Can we say eww? So I had the idea to just bite the bullet and buy an ikea solid wood cabinet and hack it into a filing cabinet. Until i remembered seeing this on pinterest:

This was from the oh so creative Martha Steward and her “office in a chest”. I love this idea because its not a huge metal eyesore in the middle of your living room. Also there is a TON of space… i dont think we would ever be able to fill all of that with our paperwork. It also gives you the ability to have a trey for organization and the pinboard idea is pretty convenient as well.

But that involved buying a large ottoman. Not really a money saver. Until i saw this picture…

Holy cow… i have that EXACT trunk in storage! I didnt even think about it… but i stumbled across Jenna Sue’s design blog and was super excited. I bought the trunk a year ago from goodwill for maybe 10 bucks. I had great aspirations for that sucker but just never got around to it.

So here she is… aint she a beaute? Nope. Not yet. But she will be!

Its actually on its second coat of paint so i should be able to post before and afters soon! A vintage trunk / Filing cabinet is underway! Woot!

Midnight Pinning

Ok, so i thought id post what images ive been drooling over these days….

Oh man, i am so in love with these tables… Youve got function, comfort and storage! Doesnt this space just look cozy? Thank the beautiful Jane over at ModernJaneDesign for the lovely image.

How about a wonderful Ikea hack!

Wow! i love this… beautiful way to hide a not so beautiful printer. Run over to PB&JStories for the full run down. This shot made me run straight to Craigstlist to look for a good piece for my office… no luck yet.

Garden for my apartment? Yes please…

Oh my goodness, im in love with this outdoor garden. Im pretty sure its perfect for an apartment. I’ve been dreaming of starting my own apartment sized veggie garden. Maybe i could hack or track down something similar and get started! How lovely would that be to just walk out onto your porch for some fresh carrots and peas?! Too bad i still have a black thumb. One step at a time. This beaut was found over at Flor e Ser.

What have you been digging lately?

Dream Art Studio

So I’m goin crazy crammed in my little office corner. I am blessed to have as much space as i have… but I’ve been dreaming of a larger space… not just an office but enough room for an actual studio.

Heres some studios I’ve been drooling over…

Incredible studio for printmaking. Link found here

This colorful art studio just seems to draw out creativity… love the space for multiple different projects. Might throw me into ADD mode. See more pictures here.

LOVE this antique cubby. Great for storage.. theres antique boxes and shelves all over the room that add beautiful texture and peeling paint – just love it. See more of the studio here.

This is such a bright room! Check out more shots here.

I adore this bright, clean art studio. All the storage space and table space… oh the things i would create in there! Check out dozens of pictures on Donnas blog.

This studio to the artist Marina Dorignac is inspirational.

And of course last but not least, Mae Chevrette.

I’ve posted about her beautiful art over here but just wanted to show off her incredible, funky studio.

I know, right? I love it. The texture, the greenery, the color… love it. Also check out her work…  youll love that even more 🙂 Till next time!

-Rach

*For original source of each image – click image!

Before & After: Door to Desk

Alrighty… its *FINALLY* done! Not that it took long to make, it just took forever to get the time to finish painting! But here we go… the “before” of Mr. Door:

And here is the oh so beautiful after:

Isn’t that just refreshing? And incase you forgot what the space looked like before… yikes! Heres a little reminder:

Eww… i know. Sorry to post such a disaster but it makes the After shot much sweeter…

In this last shot you can see the door knob hole where i run the cables through. I initially thought I’d put the desk against the wall so i didn’t expect to need to fill the latch hole but I’m definitely going to have to do a quick fix!

I will post soon my how-to on the paint! If you want to read about the building process go here, here and here!

Also,  (drum roll please) the main reason why I’ve been so determined to get my office up and running: starting friday at 6pm I am officially a full time freelance artist! I semi blame this book for gettin the fire started… read it at your own risk…  four months later you might end up quitting your job too!

-Rach

Grey + Yellow Office

I adore the combo. So, of course… I’m redoing my art studio and office in yellow + grey! Here is my “dream setup” and gives you an idea of whats goin on in my mind brain.

A. Hand build desk similar to this guy by West Elm, Ana White shows you step by step instructions on how to build your own for MUCH cheaper here.

B. Rug by West Elm

C. Sabertooth Scull from ZGallerie. Why? Because everyone needs a sabertooth tiger scull in their art studio…

D. Bookshelf from Overstock

E. cleaver Bookend from CB2

F. Manhattan office chair from Overstock (though you can see my craigslist find here)

G. Filing cabinet from CB2 or find an old one and spray paint! (saves $100+ that way!)

H. Pillow from Target

Considering i have a ton of built in shelving and really dont need a sabertooth scull (though i think it would REALLY help me get inspired… somehow) this is just fun inspiration. Hopefully i’ll be able to post the before and afters soon!

-Rachel

Office Chair Revamp: Part 1

So in my last post, i mentioned how much i loved this chair. Still do. Wallet doesnt. So to Craigslist i went and found this lovely chair posted for $40 bucks… and guess who got it down to $25! What i like the best about it is that its a very cushioned, comfy parsons chair… with wheels!

The Downsides:

-Dirty weird fitting slip cover

-brown wood that doesnt match anything

-boring fabric

-sketchy wheels (one is basically hanging off!)

So today, my main focus was to say bye bye brown!

Step 1: Clean legs, wheels and any surface to be painted. COMPLETE

Step 2: Remove legs from chair. EPIC FAIL The screws were all horribly stripped and really didnt want to let go. So i quit trying.

Step 3: Remove wheels. SECOND EPIC FAIL I’m really not sure how those suckers were even put on. It might look like a philips but it definitely was some crazy contraption meant to never be removed (for now). So i quit again.

It definitely would have been a lot easier if i could have taken everything apart but let me tell you… it just refused to let me. So out came the plastic bags and tape.


I’ve used Krylon for just about everything. This was a plain glossy white… I usually dont like a lot of high gloss when i spray paint, but this was definitely an exception. Its really more of a Satin/gloss.  Keep in mind, use THIN layers and use quite a few layers. Especially with a piece like this, i would do an incredibly light layer of paint, wait 1 minute and do it all over again. Takes some time but then it really comes out beautifully with NO DRIPS! I also flipped the chair over to paint underneath since you could see the sides it missed from the top.

I then used Krylon Metallic silver for the wheels. They were sort of an off color bronze that just wouldnt look very good with the new fresh legs. I’ve never tried metallic before so i was definitely hesitant… but this was a last effort to attempt to salvage the wheels. Just check out those beautiful legs!

And heres the wheels after they were painted silver:
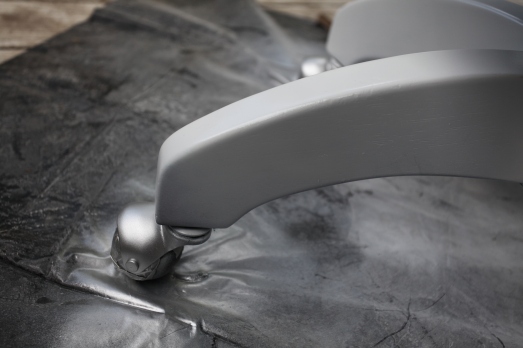
I know, right? Looks pretty legit!  So this is the first time to really use spray paint on something considered “high traffic” so we will see how well it holds up. I’ve never had to worry about picture frames or vases getting stepped on so this will be a good test to see if the spray paint that we all know and love can really stand “The Test of Rollie Chair”

I know… not a huge before and after – but this is step one, people! Definitely looks heaps better than what it did before here. I love how much one piece adds to a room. PLUS its 1000000x better than sitting on that dang ottoman. It was so low i felt like i could barely see over the top of the desk!

I’m on the search for some good fabric. I’m really digging grey and yellow right now and I will either go that route or find a good patterned neutral and attempt to sew a new slipcover. Note: Check out my fresh new sewing machine i won in a Goodwill auction for 20 bucks! AND works beautifully! Double Note: I am very inexperienced with sewing. The first and only other thing I’ve sewn was the cushions for my outdoor sectional and chair here.

So heres some fabric I’ve been shopping for. How About Orange just came out with a new line of fabrics that i adore!

Option A: Frond

Option B: Picket

Both are super fun fabrics while keeping with my grey and yellow office theme. I do love wildflower too but for a chair, that might be too much. Moving on…

Option C: Premier Prints – Definitely a bright bold yellow pattern!

Option D: Premier Prints – This is a light grey though it looks much more blue in the image. I think this pattern is a little “safe”.

Option E: Premier Prints Chevron – Always a fun pattern and I’ve definitely been seeing this style lately.

Option F: Ty Pettington – This is one of my favorites but OF COURSE the most expensive as well. Click on it larger to see the pattern a little easier.

Option G & H: Both Waverly Cross Section fabrics. Again, grey might be the easier route to go incase of any future changes but green would be bold, fun and eye catching.

I’m also new to fabric shopping so if you guys know of any great places for quality fabrics, please let me know! Jo Ann’s just doesnt cut it these days. (pun not intended… but always acceptable)

Any votes?! Help me out!

-Rach